How to manage ticket status?
Enabling/Disabling Ticket Status
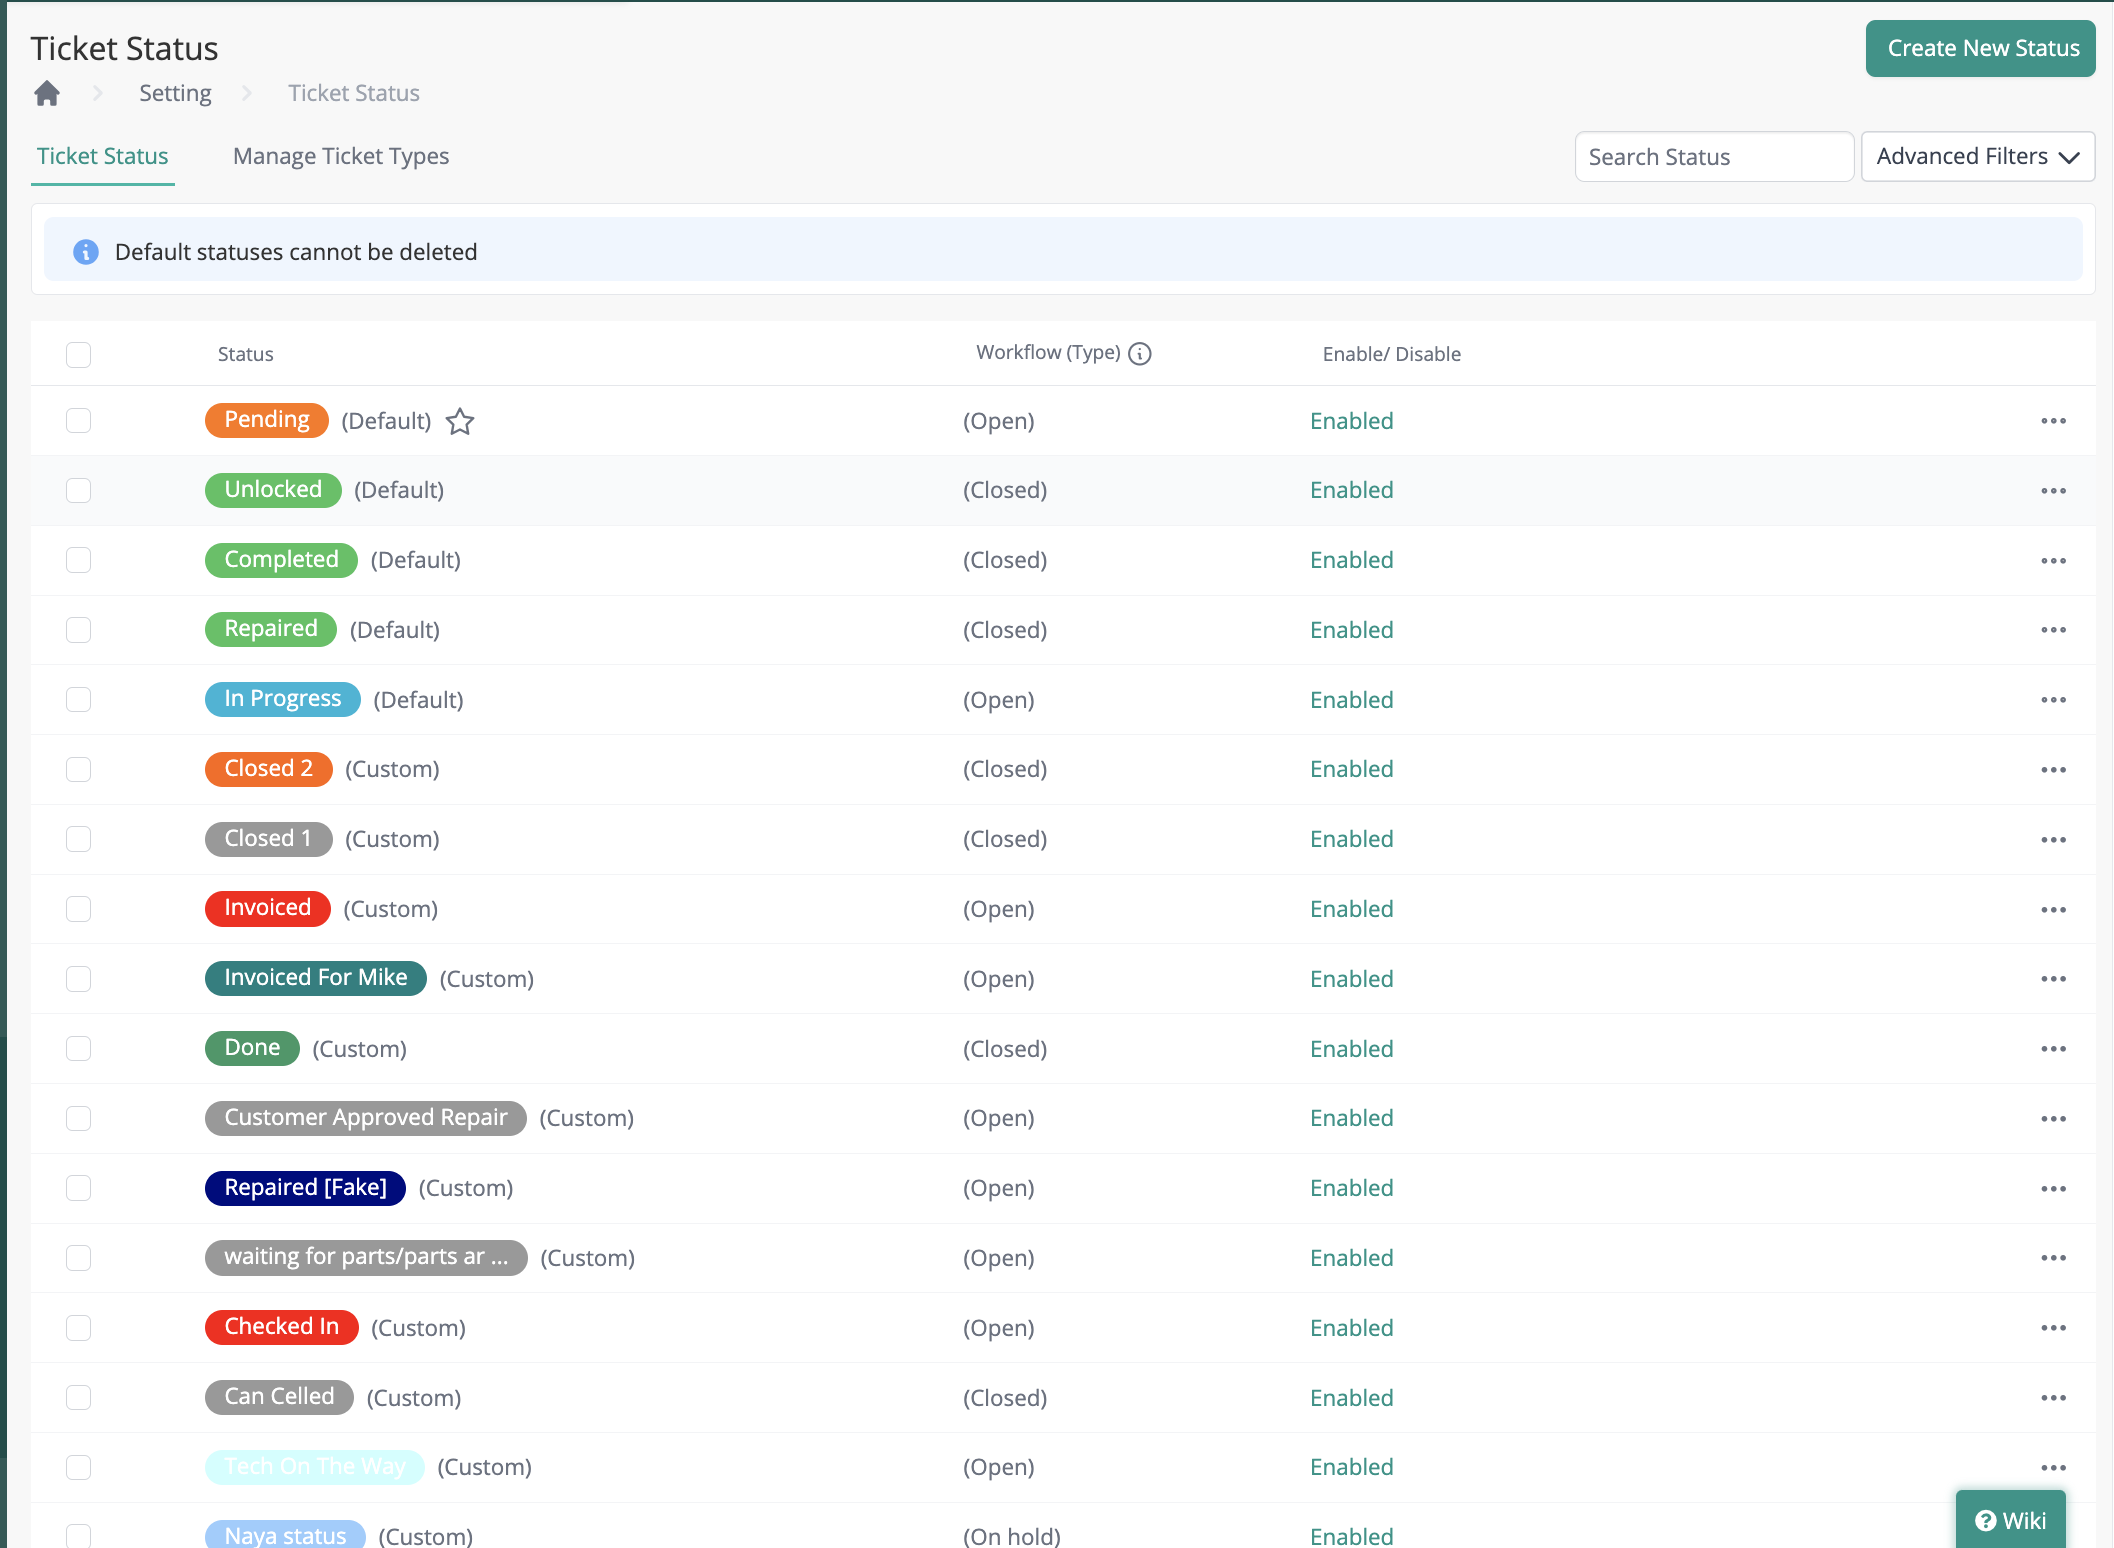
- Go to Settings and select Order Status > Ticket Status. Here, you will find a list of all existing ticket statuses.
- Under the Status column against each ticket status, click on the toggle button to enable or disable it.

Setting Default Ticket Status
- Within the Ticket Status page, locate the ticket status you wish to set as the default.
- Click on the three dots button against the desired ticket status and select Set as Default.

Creating/Editing Ticket Status
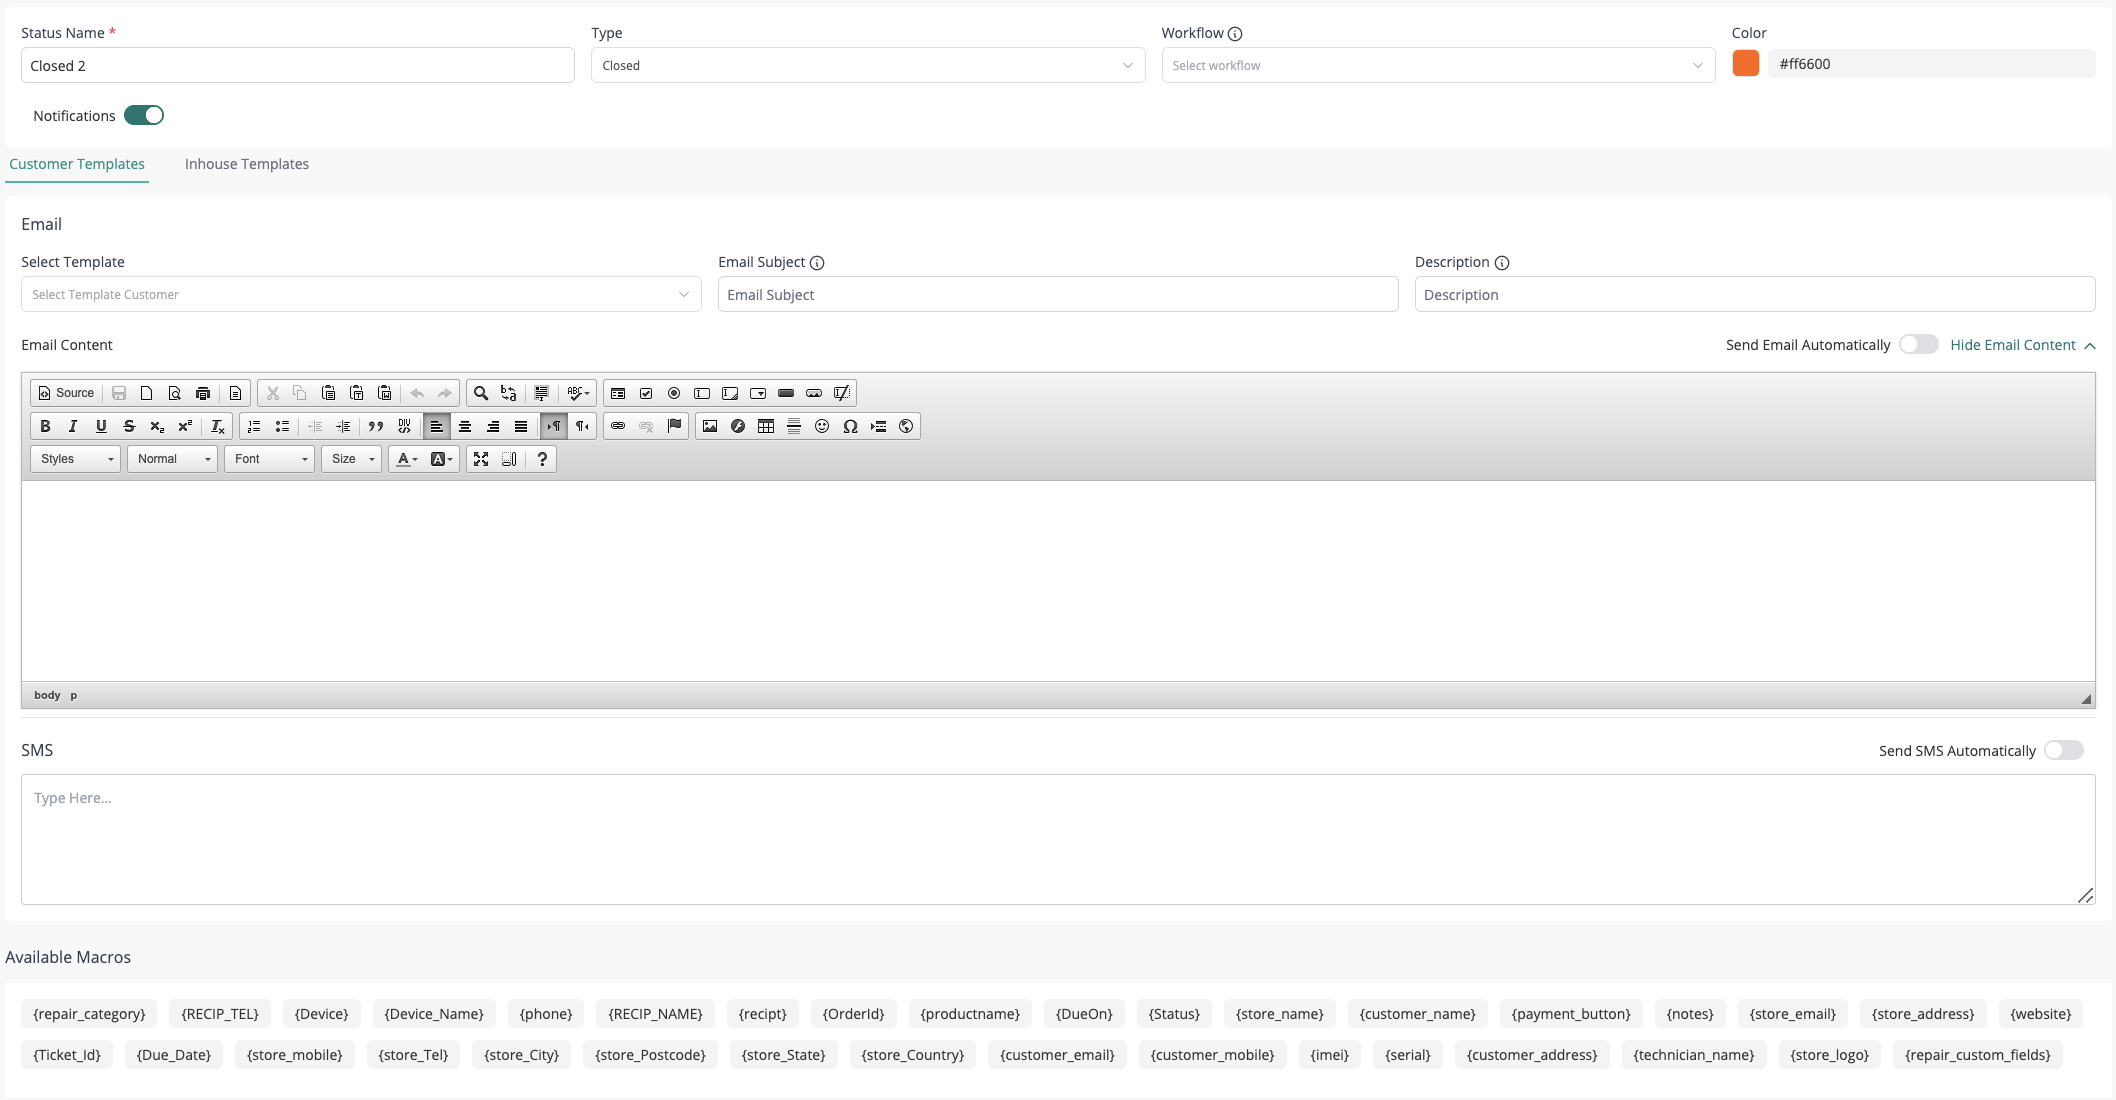
- Within the Ticket Status page, click on 'Create New Ticket'. In case of editing, click on the three dots button against the ticket status you want to modify and click edit icon.
- In this window, you can modify or create the name, type, or color of the ticket status.

Creating New Workflows
- Users can create a new workflow by typing in the workflow name and clicking on the "Add as new workflow" button.
- This allows users to customize their ticket statuses based on their specific business needs.

Filtering Ticket Statuses
- Users can apply advanced filters on the ticket status page to narrow down their search.
- By selecting specific types and workflows, users can quickly find the desired ticket statuses.

Managing Ticket Types and Workflows
- The "Manage Ticket Types" section displays the types and workflows associated with the statuses.
- Users have the option to update custom ticket types according to their requirements.
- This flexibility allows users to categorize tickets accurately and efficiently.

Email Notifications
In the past, users had limited options for setting email templates. They could only do so from the "Emails and Notification" section. This meant that they had to create separate templates for customer emails and in-house emails.
Previously, users had to choose the module and then select the status when creating an email template. However, with the new Ticket Status feature, users can now conveniently associate emails and SMS directly with the status while editing or creating the status. This eliminates the need for additional steps and streamlines the process.The recent updates to email templates have addressed these limitations.
Benefits:
The new feature offer a number of benefits, including:
Increased efficiency: Agents can save time by automating the sending of emails and SMS for different ticket statuses. This allows them to focus on more complex tasks.
Improved consistency: Customers will receive the same emails and SMS for the same ticket status, regardless of which agent is working on their ticket. This leads to a more consistent and professional customer experience.
Increased personalization: Agents can easily personalize emails and SMS for each customer. This makes customers feel more valued and improves their overall satisfaction.
Seamless and efficient workflows
It empowers users to create a seamless and efficient workflow. For example, a user could set up the following workflow:
When a ticket is opened, the customer receives an email notification with a brief overview of the issue and the next steps.
When the ticket is assigned to an agent, the agent receives an email notification with more detailed information about the issue.
When the agent resolves the ticket, the customer receives an email notification with a summary of the resolution and instructions on how to test the resolution.
If the customer is not satisfied with the resolution, they can reply to the email to reopen the ticket.
This workflow ensures that the customer and the agent are always informed about the status of the ticket and that the customer has all the information they need to resolve the issue.

